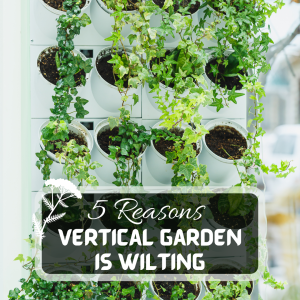
Vertical gardening is the ultimate solution for small spaces, but it operates on a different set of physical rules than traditional gardening.
The biggest hurdle? Gravity.
In a vertical system, water is constantly trying to leave the root zone. If you’ve seen your plants looking lush at the base but crispy dry at the top, you are likely dealing with Dry Pockets.
Here are the 5 reasons your vertical garden is wilting and the Pure Gardening steps to fix them.
In This Post:
Summary Checklist for a Wilt-Free Vertical Garden
Before we dive into the technical details, here is exactly what you need to do in 5 simple steps:
- Install a central irrigation pipe to reach the top-tier dry pockets.
- Shield your planters from wind to lower the transpiration rate.
- Mix coconut coir into your soil to prevent it from becoming water-repellent.
- Create an air gap between your planter and the wall to prevent overheating.
- Water in pulses to maintain consistent moisture levels throughout the heat of the day.
1. The Gravity Drain (Uneven Moisture Distribution)

In any vertical tower or pocket system, you are essentially fighting physics. Water naturally follows the path of least resistance, which means it tends to rush straight through the top layers and pool at the base.
This creates a frustrating double-edged sword: your upper plants live in a permanent dry pocket, while your bottom plants suffer from wet feet and potential root rot. To fix this, you need to change how the water enters the system.
a) The Internal Irrigation Column
Instead of simply pouring water onto the top soil surface, which rarely reaches the middle roots, you should install a central distribution spine.
- Don’t just water the top. Insert a perforated 0.5 to 1 inch diameter PVC pipe (1.3 to 2.5 cm) down the center of your planter.
- Drill 1/8-inch (0.3 cm) holes every 3 inches (7.6 cm) along the pipe. The pro move here is to stagger the holes so water isn’t just dumping out one side.
- Wrap the pipe in a thin layer of burlap or landscape fabric. This acts as a filter, allowing water out but preventing fine soil particles from clogging the holes over time.
This setup forces water to exit at every level of the garden simultaneously, ensuring the dry pockets at the top are finally hydrated.
b) The Bottom-Up Check
If you aren’t sure if your irrigation is working, stop looking at the top of the plant. Instead, perform a Bottom-Up check.
Stick your finger into the drainage holes at the very base of the planter. If the bottom is soaking wet while the top feels like dust, it’s a sign that water is channeling its way through a gap between the soil and the container wall and bypassing the root systems entirely.
If this is happening, it’s time to look at your soil density or consider the irrigation pipe mentioned above.
2. The Wind Tunnel Effect & Transpiration Stress

As vertical gardens are elevated on balconies or mounted to walls, they are exposed to much higher wind speeds than a traditional garden bed nestled on the ground. This constant airflow creates what experts call a wind tunnel effect.
As wind rushes over the foliage, it dramatically increases the transpiration rate, the speed at which a plant breathes out moisture through its leaves.
When the wind is strong, the leaves lose water faster than the roots can suck it back up from the limited soil pocket.
The result? Your plant wilts even if the soil still feels damp to the touch.
a) Micro-Climating with Wind-Breakers
To stop this moisture robbery, you need to rethink your garden’s placement.
Many gardeners instinctively push their vertical towers flush against a balcony railing to maximize sun, but this exposes the root zone to wind from all 360 degrees.
- The Shielding Strategy: If possible, place your planter against a solid wall or use a solid backing (like a treated wood board or a piece of plexiglass). This creates a dead air space behind the planter, significantly reducing the cooling effect on the root zone and slowing down the wind before it hits the delicate leaves.
- The Grounding Trick: If your tower is freestanding, try surrounding the base with larger, heavy pots. These act as a low-level windbreak, protecting the most vulnerable bottom sections of your vertical system.
b) Natural Foliar Spray
For high-value ornamental plants or large leafy greens (like Chard or Kale) that have a lot of surface area, you can apply an extra layer of skin protection.
- The Expert Gem: Use a natural kelp-based foliar spray. Kelp contains specific hormones and minerals that help thicken the plant’s cuticle (the waxy outer layer of the leaf). A stronger cuticle acts like a natural windbreaker for the plant, making it far more resilient to wind-induced wilting and tip burn.
- Application Tip: Spray your plants in the early morning so the film can dry and set before the heat and wind of the afternoon kick in.
By reducing the atmospheric demand for water, you give your plants a fighting chance to keep their leaves strong and healthy, even on a breezy balcony. [1]
3. Low Soil Volume & Hydrophobic Death Zones

One of the harshest realities of vertical gardening is the limited root space. Most vertical systems rely on small pockets or narrow channels that hold a fraction of the soil found in a traditional garden bed.
Then this small volume of soil dries out completely. But it doesn’t just get dry, it becomes close to hydrophobic.
At this stage, the soil repels water.
You might think you are doing a great job watering, but the water is just sliding down the gaps between the dried-out soil and the side of the container, straight to the bottom, without ever reaching the roots.
a) The Pure Soil Formula
To prevent this, you cannot rely on standard, peat-heavy potting mixes, which are notorious for turning into bricks when dry.
Instead, you need a mix specifically engineered for high-drainage, high-retention environments.
- 40% High-Quality Compost: This provides the essential nutrients and the biology (microbes) that keep the soil alive and porous.
- 40% Coconut Coir: This is the secret weapon for vertical success. Unlike peat moss, coconut coir has a neutral pH and, most importantly, it is much easier to re-wet once it dries out. It acts like a high-performance sponge that prevents hydrophobia.
- 20% Perlite or Vermiculite: These volcanic minerals add permanent aeration. They keep the mix lightweight (crucial for wall-mounted systems) and prevent the soil from compacting over time.
b) The Immersion Reset
If you notice water running straight through your planter while the plant continues to wilt, you have hit the Death Zone. A regular watering won’t fix this; the surface tension is too high.
You must reset the soil’s hydration.
If your system allows it, remove the individual pot or pocket and submerge the entire root ball in a bucket of lukewarm water.
Keep it submerged for about 15 – 20 minutes. You will see air bubbles rising to the surface; these are the dry pockets being forced out.
Once the bubbles stop, the soil has been fully re-hydrated.
If your system is fixed to a wall, use a mist sprayer to slowly dampen the surface for 10 minutes before doing a deep pour. This breaks the initial surface tension so the soil can begin absorbing water again.
By using coconut coir instead of peat, you’re significantly extending the time your plants can survive between waterings.
4. Thermal Conductivity (The Cooked Root Syndrome)

A common mistake is focusing only on leaf temperature while ignoring the root zone.
Many vertical planters are made of thin, dark plastic or metal, which possess high thermal conductivity.
In direct sunlight, these materials absorb solar energy and transfer heat directly into the small volume of soil.
Most vegetable roots struggle when soil temperatures exceed 106°F (41°C). At this threshold, many plants enter a physiological shutdown. [2]
They stop taking up water as a defense mechanism to prevent internal pressure damage.
This is why you may see a plant wilting even when the soil is visibly wet; the roots have effectively turned off.
a) Thermal Shielding for Root Protection
If you are using dark-colored containers, you must find a way to reflect light rather than absorb it.
High soil temperatures lead to rapid evaporation and root stress that no amount of watering can fix.
- Reflective Coatings: If you already own dark plastic planters, apply a coat of light-colored, non-toxic outdoor paint (white, tan, or light grey) to the exterior. This simple change can drop internal soil temperatures.
- Fabric Sleeves: For pocket systems, consider sleeving the dark plastic with a light-colored breathable fabric like burlap or light canvas. This adds a layer of insulation and allows for evaporative cooling through the fabric.
b) The Air Gap Insulation Technique
When a vertical garden is mounted directly against a house wall, especially brick, stone, or concrete, the wall acts as a thermal mass.
It absorbs heat all day and radiates it directly into the back of your planter well into the evening.
Creating a Thermal Break: Mount your vertical system onto a frame or spacers that create at least a 0.75-inch (2 cm) air gap between the planter and the wall.
This gap allows air to circulate behind the garden, preventing the baking effect from the wall’s thermal mass.
This is particularly critical for south-facing walls where heat buildup is most intense.
5. Overcoming the Once-a-Day Watering Myth

In a traditional garden bed, the earth provides a massive reservoir of moisture. In a vertical system, you have removed that safety net.
Because the soil volume is so small, a vertical garden can move from fully hydrated to the permanent wilting point very fast.
a) The Pulse Watering Method
Instead of giving your plants one heavy soak in the morning, which often leads to nutrient leaching and runoff, adopt a pulse watering schedule.
Apply smaller amounts of water 2 – 3 times a day (early morning, midday, and late afternoon).
This keeps the soil moisture levels consistent and prevents hydrophobic drying mentioned previously.
If you use an automated timer, set it for three short 2-minute cycles rather than one long 10-minute cycle.
b) Low-Tech Sub-Irrigation (Ollas)

For home gardeners who cannot water multiple times a day, you can use Ollas (porous terracotta pots) to provide a constant, slow-release moisture source.
Bury a small, unglazed terracotta pot inside your vertical planter pocket, fill the pot with water, and seal the top with a lid.
The water will slowly seep through the clay walls only when the surrounding soil is dry. This provides a gravity-fed hydration system without over-saturating the foliage.
Just Pure Gardening Pro-Tip

Before planting, pre-soak your potting mix. If you put dry soil into a vertical planter, it is much harder to achieve deep saturation later.
Start with a moist foundation, and your dry pocket problems will be much easier to manage!
If you’re just starting your vertical journey, put your thirstiest plants (like Mint or Spinach) at the bottom, where water naturally settles, and your tough survivors (like Thyme or Sedum) at the top.
Do you have a specific vertical system that is giving you trouble? Send us a message and let’s troubleshoot your setup together!
What to Do Next?
If you enjoyed reading this article, check out our other similar ones in the Gardening How To or Garden Tools section.